When you don’t have a tilt-shift lens, you’ll have to rely on Perspective Warp in Photoshop. The Perspective Warp is excellent for correcting perspective. In this article, I’ll show you how to use it.
How to Use Perspective Warp in Photoshop
The perspective can get distorted when you take a photo of a building from too close. While it’s possible to correct it, there are limits. A lot of times, you can only make it better and not fix it entirely. Here’s how to use the Photoshop Perspective Warp.
Step 1: Unlock the Background Layer
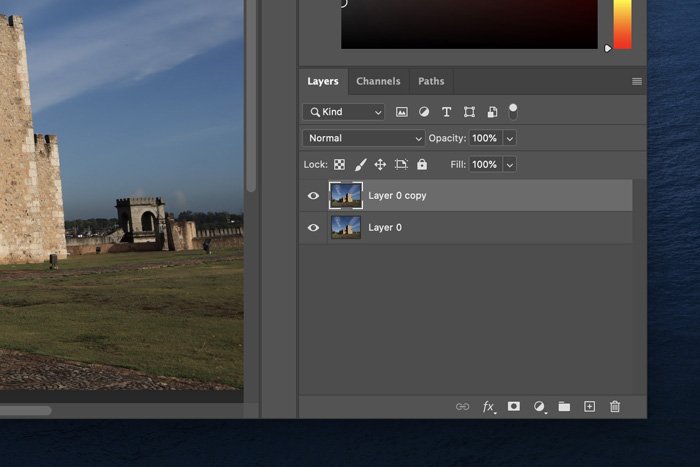
Open the photo in Photoshop. Double-click on the background layer to unlock it. Click “OK”. It’s also a good idea to duplicate the background layer, so you always have a copy of the original one.
Step 2: Apply the First Perspective Warp Grid
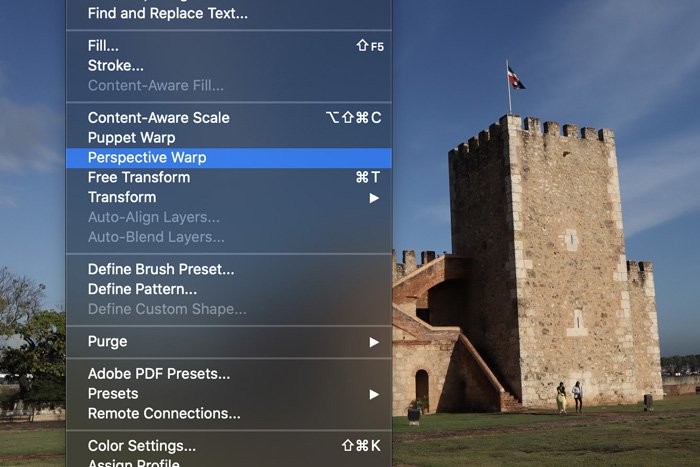
Go to Edit and choose Perspective Warp.
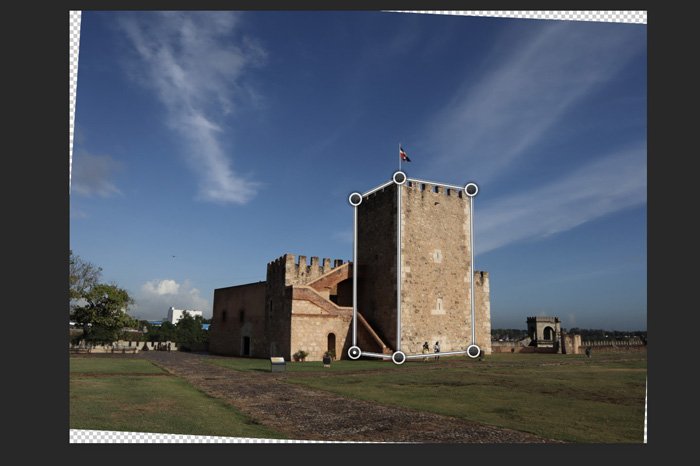
Close the pop-up window and start drawing a perspective grid on the building you want to distort. The Photoshop perspective grid doesn’t have to match the exact lines of the building when you first draw it. Once the grid is there, you can use the corner handles to match the lines with the edges of the building.
Step 3: Apply a Second Photoshop Perspective Warp Grid
Next, draw another grid on a wall that connects with the first one you used.
Again, use the corner handles to match all the lines. The second grid will also automatically connect with the first one. If the lines light up blue, they’re ready to connect. If they’re orange or yellow, you can’t join them. You can distort the walls separately with the power of the Perspective Warp.
Step 4: Correct the Perspective
In the top menu, select “Warp”. Now, use the corner handles to correct the perspective. Make sure that all vertical lines are truly vertical. If the perspective in your photo is heavily distorted, don’t correct it too much because it will look bizarre. Once you’re finished, hit the checkmark to finalize the perspective correction.
Step 5: Crop the Image to Remove Distortion
After using the Photoshop perspective warp, you’ll notice distortion on the edges of your photo. You need to crop the picture to get rid of those ugly edges. Select the crop tool and set an aspect ratio. Drag the ratio over the photo to create a cropping grid. Once you’re pleased with it, double click to crop. That’s it.
Common Perspective Warp Questions
How to Change the Perspective of an Image in Photoshop
There are a few ways to alter the perspective in Photoshop. The most common ones are by using the Perspective Warp or Perspective tool.
How to Warp an Image in Photoshop
Make sure to unlock the layer you’re working on. Go to Edit > Transform, and choose Warp. Now drag the handles or any area in the photo to bend and twist the image.
Conclusion
If you like to take photos of buildings, knowing how to use the Photoshop Perspective Warp is essential. Perspective Warp allows you to correct perspective quickly. It’s not as professional as using a tilt-shift lens, but it sure is a lot cheaper. Looking for more great Adobe Photoshop tutorials? Check out how to remove a background or select and edit hair in Photoshop next!


